Sunday, September 18, 2011

Issue with Accessible wade's extruder with Arcol hot end

Issue: filament feed hole alignment of Accessible wade's extruder with Arcol Hot end.

Here is the image showing the misalignment of arcol hot end - filament feed hole with wade's extruder..

See the filament feed hole of Accessible wade's extruder is not properly aligned with arcol hot end feed hole


Another view the misalignment

Closeup view


Another view

If i move the arcol hot end a little bit or the wade's extruder, then the filament feed hole are aligning.

Some more images of the issue.


If i insert the filament before tightening the screws,able to feed the filament...but if have to change the filament..i can't loosen the screws easily while the printer is completely assembled...


Any thoughts....how to solve this issue...Please..

Assembled bottom plate + belt + y-axis motor

Installed the bottom plate + belt + y-axis motor.

Here are some of the issues i ran into.
  1. I ordered m3 nylock nuts but not the M3 nuts. I ran into a lot of issues due to this.
  2. I  need to order M3 nuts...
  3. I am able to manage to install y-axis motor using the hardware i bought from HomeDepot. I need to get the M3 nuts to rectify the situation.
Here are some of the images..
Bottom plate before gluing to the bearings
 
View from below -showing the bearings beneath the bottom plate

See the X-mark on the bushing. The bushings are uneven, so i need to try a different sides to keep the bottom plate without wobbling

Closeup view the bushings below the bottom plate
 
Here is mess i made on the pulley. Because i haven't ordered the m3 nuts, i bought #4-40 flat head screw + nuts from HomeDepot and try to fit the nut into the pulley. As the nut, doesn't fit into the slot, i used soldering gun to widen the seating..I need to replace this, when i receive M3 nuts.

The above image showing the pulley + M3 x 10 bolt + #4-40 nut didn't work on the motor, because the M3 x 10 bolt head it popping out of the pulley and it is not allowing the motor to rotate.


 So this time, i bought #4-40 1/4 inch and tried to install the motor. See the image below.

I bought the following hardware...

Here is the hardware i bought from HomeDepot. #4-40 x 1/2 inch for M3 nut

#4-40 1/2 inch should work, but the screw head is protruding from the pulley, so i bought #4-40-1/4 inch screw + nut... see the image below.


 This time it worked...Able to install the y-axis motor finally.

Moral of the story, buy the correct size screws and Nuts (first time itself)

#6-32 x 1-1/4 inch to use a hinge to hang the idler end of the extruder. I don't have the image, but i will add it later.

 
Installed the y-axis motor + belt

Installed the y-axis motor..but i am using #4-40 1/4 inch screw + nut. This need to replaced with M3 nut + M3 grub screw

Belt tightened

Another view the bottom plate..See the grease marks on the plate...

Closeup view y-axis motor + belt. I am unable to use three screws to hang the motor, because the fender washer is obstructing the third hole...

y-axisinstalled using only two screws..I am not sure this is the case with the other people 'Prusa mendel'

Another view the y-axis motor - motor hung be two screws only..

Tuesday, September 13, 2011

Able to assemble x-Axis, z-axis, front and back threaded rods.

Today,  I made a lot of progress...

I am able to assemble the front threaded rods, back threaded rods, x-Axis smooth rods, cut the MDF board to size... Here are some of the images.

This is where is left last week. I ordered the wrong size of fender washer, so couldn't conitnue lastweek. I got the parts yesterday from mcMaster.com.Resumed the assembly...

Front threaded rod...notice the 608 ball bearing and fender washers

Front threaded rod inserted between the two vertex built earlier
 If you observe closely, there is no back threaded rod in place. Frame can stand on its own at this point.

Back threaded rod assembled and in place...See the 608 bearing in the center. 


I forgot the to take images of back threaded rod assembly...bottom and top ones separately. (pre-assembled) Sorry...

Frame is not tightened at this point of time..

Front threaded rod - another view

Front threaded rods - side view from right

Front threaded rods - side view from left

Back threaded rods - side view...See the 608 bearing in the center
Started the jigging process. I made two jigs - one 234 mm and another with 290 mm. If you have not made the jigs ready by this time, please go back make the jigs ready. With jigs, measuring and tightening of the frame will be fairly quick.

This image is with jigs snugly fit into the left verted traingle - 290mm and in between the vertex traingles - 234 mm

I forgot take images of pre-assembly of center threaded rod in the center of the printer...This rod is to hold the z-axis smooth rods. Also in the image, you can see a washer tied to a thread. I used this as a plumb to find the center on left and right side of the printer for this threaded rod. ( i hanged the plumb from center of z-axis mount - see the u shape in the z-axis mount)


See the z-Axis mount on the left. You can see back threaded rods at the back
Spacing between vertex triangles is exactly 234 mm...

Another view - showing the jigging process

Top view of the frame - showing the z-axis mounts

Left side - z-axis motor mount + aligning the threaded rod for z-axis smooth rods
Aligned the threaded rod in the center for the z-axis smooth rods. Smooth rods were not installed yet!

Thread tied to a washers to find the center point for threaded rod (for the z-axis smooth rods)

Bottom plate 145 mm X 225 mm and top plate 225 mm X 225 mm
Holes were drilled with 3mm drill bit (MDF board)

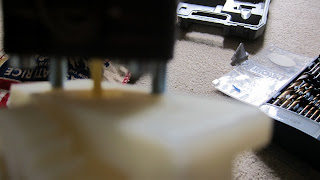
You may be wondering, what is this part!!!. This is my jig of 140 mm
I used the above jig, to measure the distance between the smooth rods for x-Axis
Verifying the distance between the x-axis smooth rods - 140 mm


Another view of using the jig of 140 mm

Friday, September 9, 2011

Wednesday, September 7, 2011

Ordered hardware for Wade's Extruder

Ordered hardware for Wade's extruder and timing belt from mcMaster.com

See the Bill of materials Page...

One thing i observed was, even for 1 or 2 washers, i need to order 100 pieces because Mcmaster.com sells in bulk...That'w why this build is costing more money. But i will have the hardware for few more Prusa or Mendel builds.

It seems this is not the last one, i am going to build....

Tuesday, September 6, 2011

Received the Arcol Hot End

Received the Arcol Hot End + 0.35 mm spare nozzle + Hobbed bolt.


Arcol Hot End - 0.5mm nozzle + 200 K power resistor


Arcol Hot End + 0.35mm spare nozzle
see the cooling fins!!!

Hobbed Bolt